
The Beginner’s Guide to Coloring in Procreate
There are many ways to color your Procreate drawing beyond just manually coloring with a brush. Procreate has a variety of powerful coloring tools that will help you add color easily to your drawing. There are basic coloring tools to know as a beginner and there are helpful coloring tricks that I wish I knew when I first started to draw digitally on Procreate. Knowing these features will make your drawing workflow go smoother and faster. If you want to learn more about coloring in Procreate, then you are in the right place!
Adding color to any artwork can be daunting in itself. Personally, it was one of my biggest fears to do as a creative, so I avoided coloring anything for a long time. Even though I made crafts and made hand-drawn black and white inked work, I never tried to color them myself and became comfortable to using stuff that was already colored. Part of it was because I did not have any formal education in color theory and another part was that I lacked the confidence in myself to be good enough to color among so many other talented artists.
Now, after three years of digitally drawing art, I by no means consider myself an expert in coloring and am still learning every day. But I have picked up a few strategies that have helped me better understand color and to also simply stick to colors I like, which are pastel and vibrant colors. The built-in Procreate tools have allowed me to explore and play with colors, helping me evolve my art and coloring techniques overtime. I hope these Procreate coloring tools and strategies will help you get to where you want with your art too and color as you have imagined in your head to your digital pad.
Color Profiles in Procreate
The color wheel will change based on the color profile - RGB or CMYK. RGB color values are typically what you see on your screen and stand for Red, Green, and Blue. CMYK are color values that stand for Cyan, Magenta, Yellow, and key (black) and are the preferred color profile for printing because these true colors get printed. While most standard printers use CMYK color for printing, some printing vendors can print in RGB color. If you plan on printing your artwork, it is best to check with the print vendor their preferred colors, along with format and size, to ensure your canvas is set accordingly. This is to also ensure that the colors you want printed will be printed exactly or close to the colors of the final product.
The default screen setting will be P3 which is an Apple screen technology, allowing for a wider range of colors to be displayed.
Color Drop Tool
The Color Drop tool is by far the best feature in Procreate because it helps you be efficient of your drawing time and reduces your time to manually add color. This works best if you already have line work drawn and would like to simply fill in the space with a solid color. When you drag and drop the selected color, this tool will automatically "fill" in a solid color hatch within any closed line work. This is a handy tool for creating elements in one, solid color. If you change your mind and want to change the color, you can use the same drag and drop Color Drop feature to adjust the color.

While the Color Drop tool is a real time saver, there are a couple of nuances to this feature. Sometimes, when you drag and drop, not all pixels will be filled, especially at the gaps and corners, and there may be certain areas and tiny pixels that will not be filled. It is important to zoom in and check your solid fill every time you use the Color Drop tool after to ensure all pixels have been colored. Sometimes, for the smaller elements, I fill those in manually to make sure those get colored, especially for artwork that will be printed and made into merchandise.

Color Fill Using Shape Selection
If you use the selection tool to create a shape (either by selecting the Ellipse or Rectangle tool), you can select the Color Fill button in the same bar underneath to automatically fill in the current color when you make your shape. This allows you to create shapes with a solid fill automatically, rather than needing to go back and Color Drop the selected shape.

Fill Layer Tool
Another coloring tool in Procreate is the Fill Layer feature. This feature allows you to fill the entire canvas in one command and works best if you want to quickly create a solid background color in your drawing. This can be activated by selecting any layer and opening the layer tools on the right side. Select the Fill Layer and the layer will automatically will be filled with the current color selected.

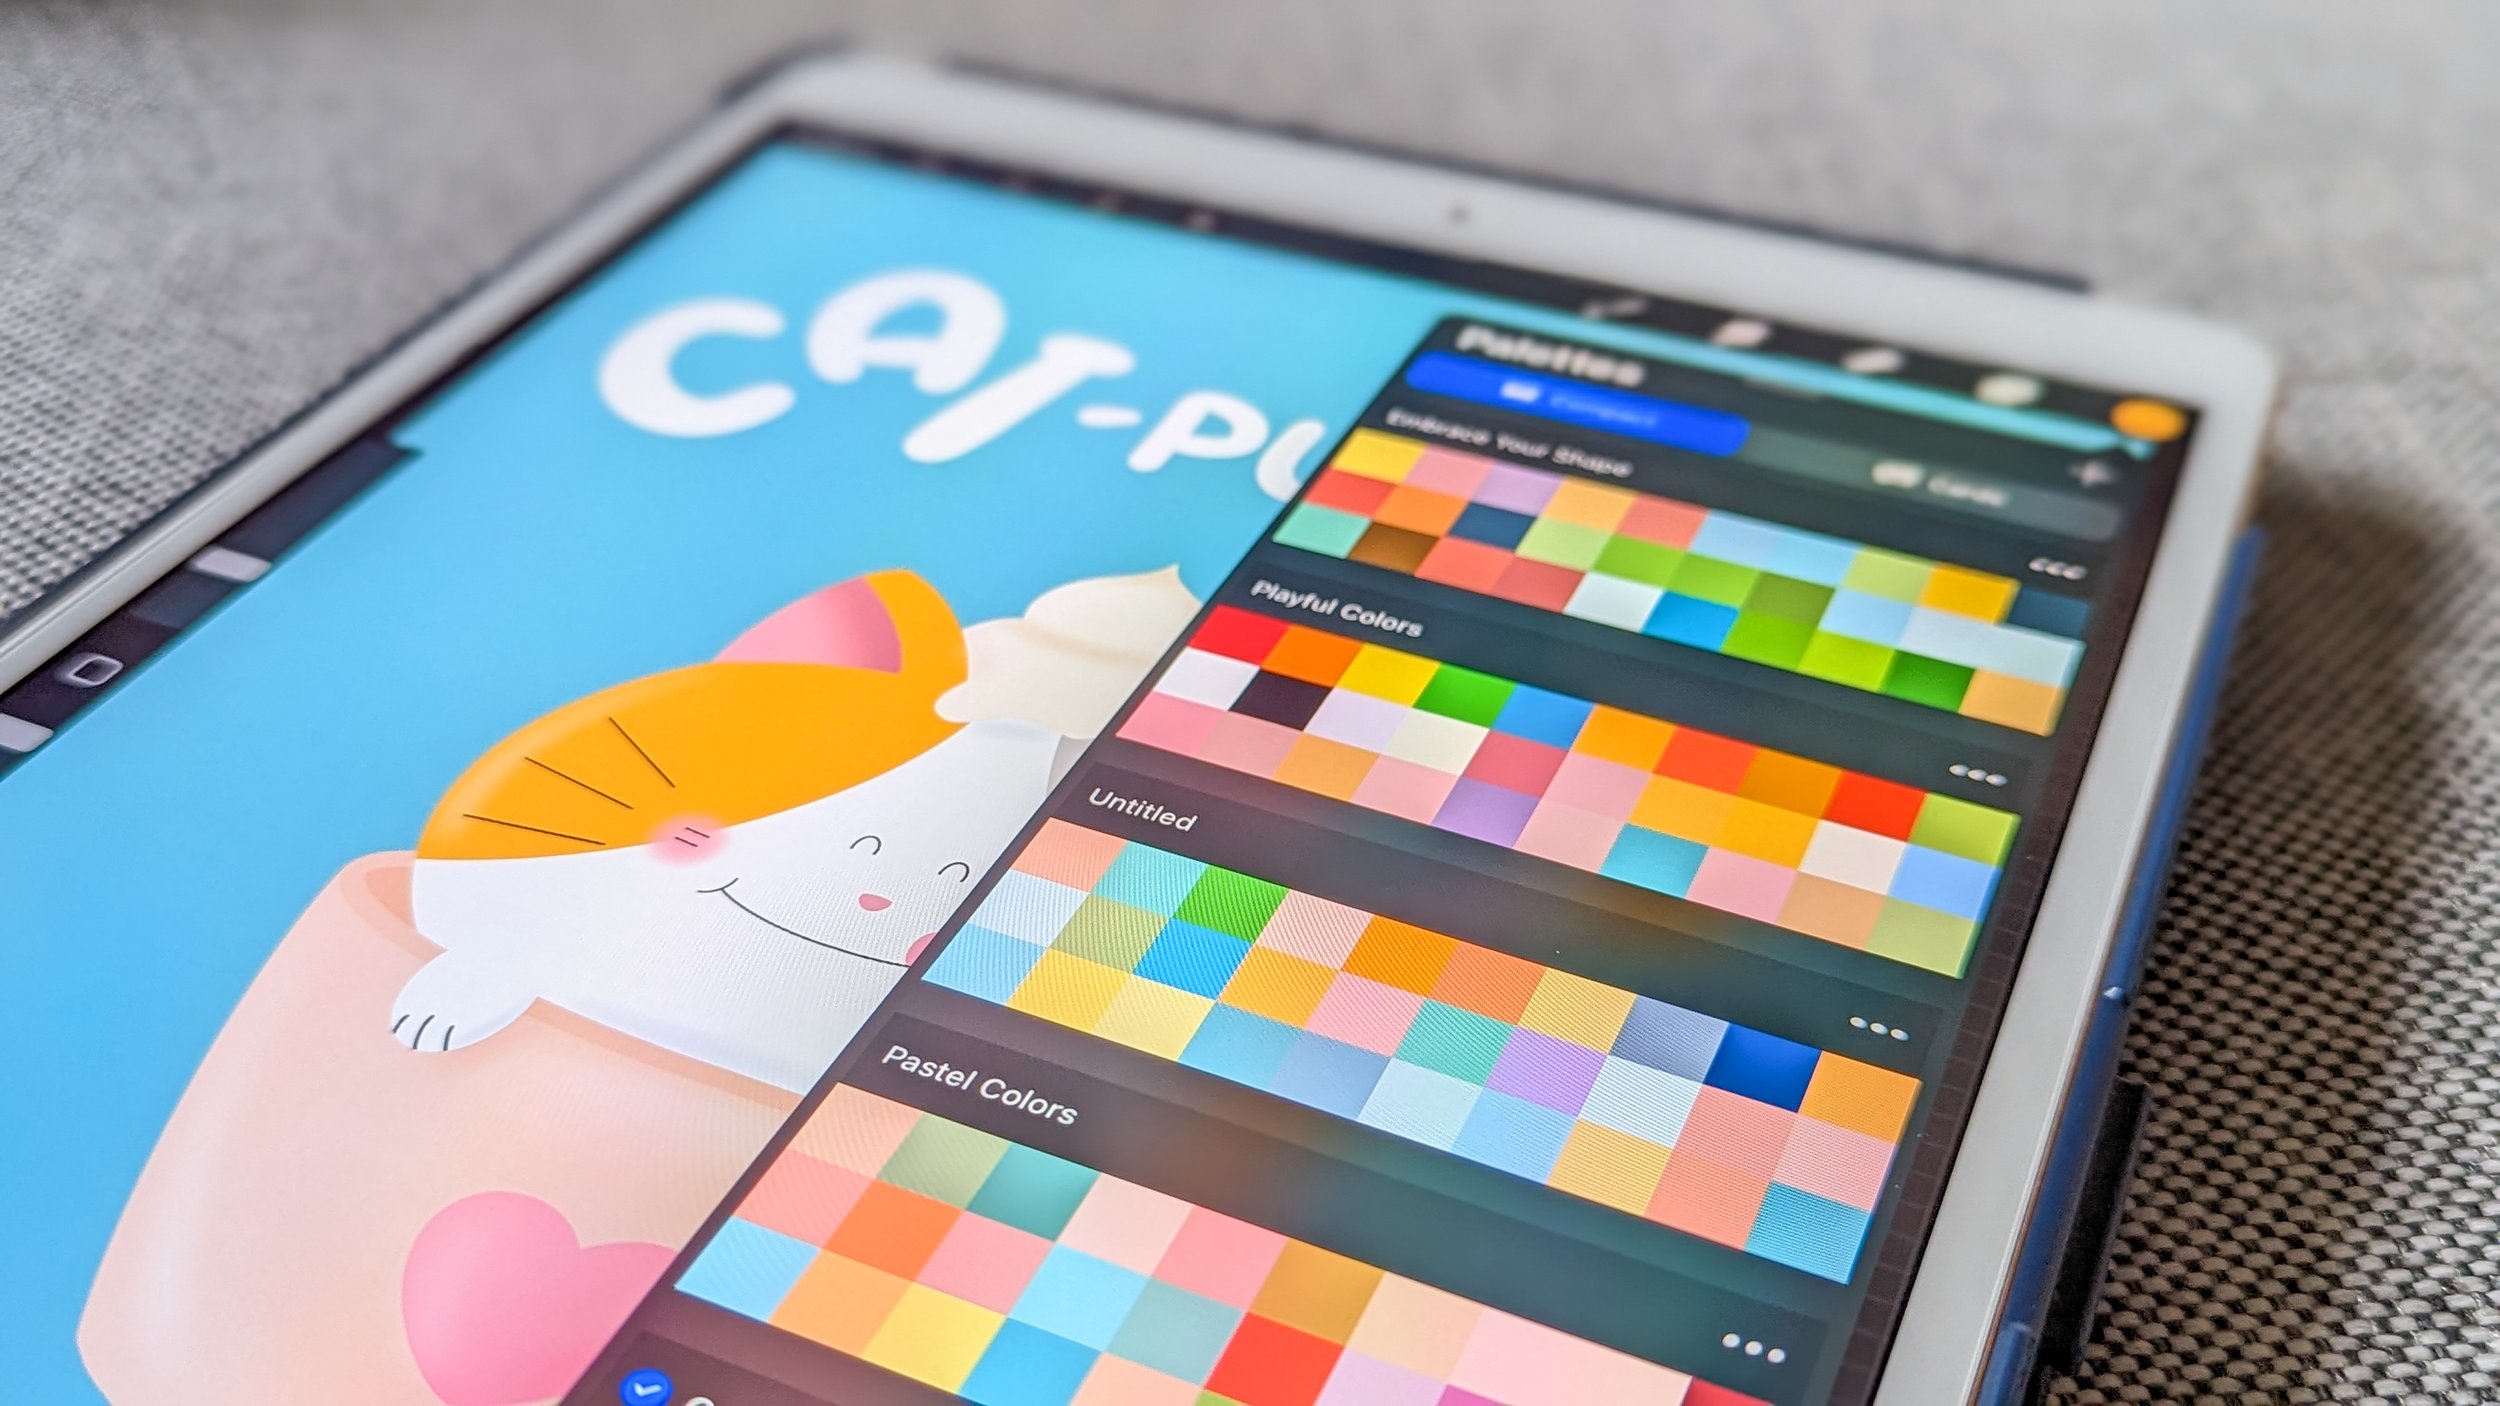
Color Palettes
In Procreate, you can add colors and make different color palettes by simply tapping into an open square with your Apple pencil in the Palettes section. Creating a color palette will help you keep a collection of colors you regularly use and be the core palette for your drawings. This will also be useful if you want to stick to a specific color palette that will define your style.
There will be standard color palettes in Procreate for you to use and start with. Ideally, start playing with different colors and shade of colors to get an idea of what they look like on screen. The more you do, the more you become familiar with the colors and know what colors and shade you like.
One color palette trick in Procreate allows you to grab any image from the internet and drop the colors from the image into a palette. This removes the step of downloading the image and constantly using the eyedropper tool to copy and paste the color value. This is a very useful trick if you like a color palette in an image and would like to use the same colors for your own artwork.


Eyedropper Tool
The eyedropper tool in Procreate can be accessed by pressing gently anywhere on the canvas with your Apple pencil. You can also directly access the eyedropper tool by clicking on the square between the brush size and brush opacity panel on the left side.

Built-in Color "Wheel"
In Procreate, you can access the built-in color wheel by going into the selected color and selecting Harmony. Click Complementary on the upper right hand corner to switch out the color harmony combination. This is a useful color guide that will allow you to create color palettes and combinations.

Once you get a hang of using colors in Procreate, you will eventually find a set color palette that suits you and your art. Be patient and keep experimenting because it does take different iterations of art to find the colors that fit your unique personality and style. I was able to find my unique style after many drawing iterations, which has led me to create cute, positive cat art like below!
This artwork is available to purchase as a Displate poster.
Choosing color is also an art in itself, so do take the time to explore and experiment with colors in Procreate. I find it helpful to use other sources for color inspiration such as nature, other artwork and graphics, and colors from other aspects in your life.
When you do have a set color palette, keep your mind open to continuously explore other colors - this is meant to help you improve your color choices even if you don’t plan on using them. This adds spontaneity and, sometimes, the colors you mistakenly choose or would not have considered using will be the ones that will be your best artwork.
Don’t feel restricted from using other colors because this helps with your aesthetics on your Instagram grid. While it’s good to have a core color palette, I think sticking to it will prevent you from growing as a digital artist and a creative because it hinders you from exploring new ideas. It’s okay to widen your color palette range, while also having a core palette to stick to.
Do you have a color palette you enjoy using? I enjoy using the colorful, pastel colors for my art. Let me know in the comments, I would be happy to hear your answer!

Interested in working with me? Fill out the Contact Form.
Check out my portfolio or my latest work on my IG @chubcatart!
For brand collaborations, check out my media kit.

If you are looking to build a strong online presence with your art, you are in the right place! Here at ChubCatArt you will find resources that will help you stand out and be seen in your art journey. Take the leap and let’s get creative together! Read more.